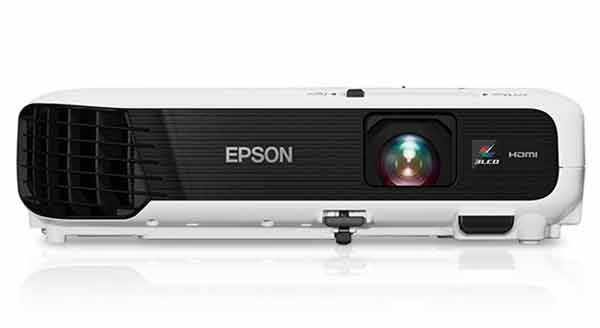
Link to Epson Refurbished VS 240 SVGA 3LCD
The VS240 measures 3.2 by 11.7 by 9.2 inches (HWD) weighs 5.3 pounds
Recomended Projector for this project BenQ MX631ST XGA Short Throw DLP Projector
C/NET how to choose a Projector
xrandr has linux show what is on the HDMI Bus
lsusb has linux show what is on the computers USB Bus
Consider getting a tool called "disper"
Linux Systems Using nVidia Drivers This guide is for users of the proprietary nVidia driver on Linux Distributions. It is assumed that you have properly setup your drivers according to your distribution’s documentation, and you have a working xorg.conf file in place.
If you wish to make the changes permanent in setting up your system for dual monitors it will be necessary to modify your xorg.conf file. It is always a good idea to make a backup of any critical file before making changes:
user@linux:~ $ sudo cp /etc/X11/xorg.conf /etc/X11/xorg.conf.old For those using systems that use the root user instead of sudo, change to root and enter: root@linux: # cp /etc/X11/xorg.conf /etc/X11/xorg.conf.old The exact location of the xorg.conf file can vary so check your distribution’s documentation.
If you want to make your changes permanent run nVidia settings from the terminal:
user@linux:~ $ sudo nvidia-settings Or, as root:
root@linux: # nvidia-settings
If you do not want to write the changes to your xorg.conf file simply run the nVidia Settings program (nvidia-settings) from your desktop’s menu, usually in an administration or system menu, or from the terminal as a normal user run:
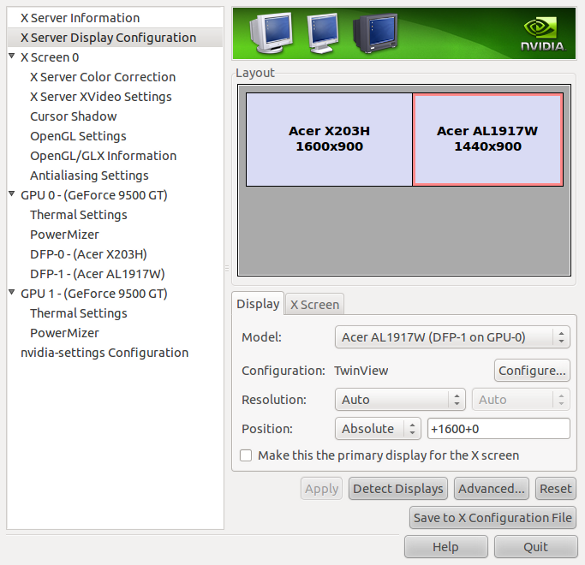
user@linux:~ $ nvidia-settings Once you have opened nVidia Settings, click on X Server Display Configuration. Select the monitor you are wanting to use as your second monitor and click Configure.
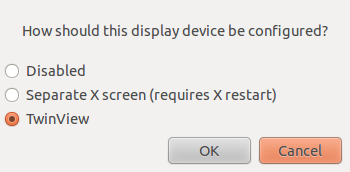
After clicking Configure, select TwinView and click OK.
Click Apply and if you are happy with the way things look click Keep to save your new settings. Don’t worry if something goes wrong, the settings will return back to the previous settings in 15 seconds without any action. nVidia Settings should take care of selecting your optimum resolution etc, but that can be changed as needed. When you are happy with everything click on Save to X Configuration File.
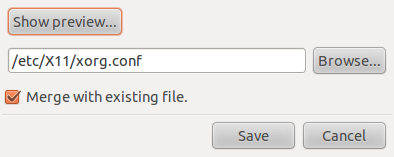
Click Save and you should be set. You may want to restart X or your machine just to make sure all the settings carry over the next time you log in.